Norman Mod Workshop Tutorial
Tips and Ticks originally taught to the AAU Animation Club by Joshua Slice in a live demonstration on campus, 10-03-2009, is now in a SUPER EASY written tutorial by Vaughan Weigert. Enjoy!FIRST, Prepare the Norman Character for Modding Blendshapes: 10 easy steps
1. Open New Norman file
2. Go to Outliner: Expand the Norman Character Group, under "World Space", select "grWorld_Geometry".
3. Go to Attribute Editor: Under "Display" go to "Drawing Overrides" --> select "Display type": Normal
4. Go to SHOW menu--> polys only.
5. Drag Select with your mouse, all the Norman geo displayed and hit CTRL "D" to duplicate it.
6. Put your cursor over the Outliner and hit "F" to find this new group...
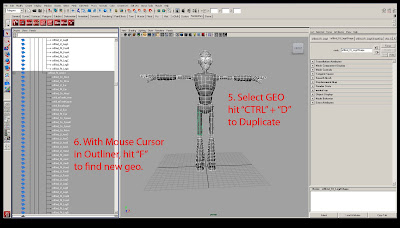
7. Then Hit CTRL "G" to group the selection. With cursor in Outliner, hit "F" to locate the new Group.
8. Double Click this new group and rename it "Blendshapes".
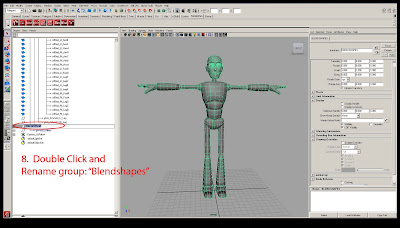
9. Then Middle Mouse click/drag this new group out of the Original Norman hierarchy.
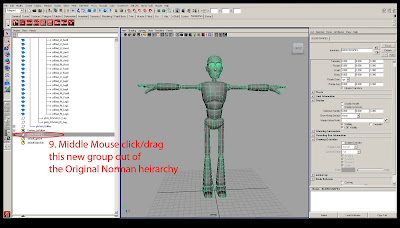
10. With the "Blendshapes" group selected, use the Translate Tool to move this new geometry to the side.
SECOND, Setting up the Blendshapes: 4 Steps
-with a little repetition.
1. Delete any geometry on the Norman Dup that won't be used as a Blendshape...
Typically, this means you can delete the NORMAN DUP's Feet, Hands, Eyeballs, Nose and Ears.
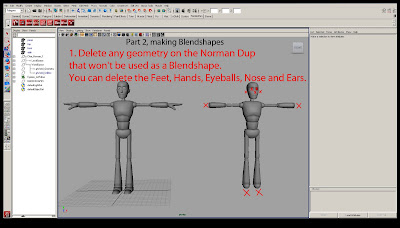 NOTE ON FEET: If you want to SHAPE the feet/shoes geo, you can keep the Feet Geo for your Dup (blendshape) Norman.
NEED to make a character with tiny feet? It's easier to make everything else on the character bigger, than to scale the feet down. It's also easy to WRAP a Shoe Geo shape to the foot as well.
2. BEFORE selecting Norman's head to make a blendshape: go to the Blendshape Editor and check the advanced settings. It should be set to "FRONT OF CHAIN".
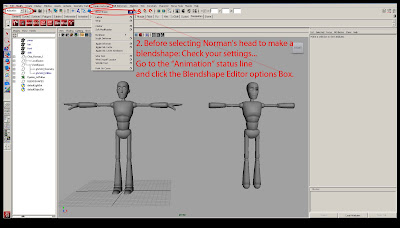
3. One part at a time, Select Norman Dup Geometry then select Original Norman mesh geometry and hit "Create Blendshape".
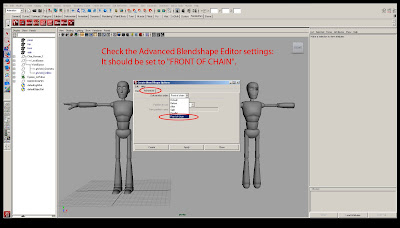
4. Then select the Original Norman mesh and look in the Channel Box. Where it says "blendshape#": make sure it is set
to "1". Do this for all Original Norman parts that have blendshapes.
Now You Can Start Modding!
It's best to have a sketch (or reference photo) of the character you are going to mod Norman into, BEFORE you start modding.
Check it out!
Next, part two of the Norman Modification Workshop, "Starting With The Head"...


Thanks so much for doing that!!
ReplyDeleteDude, you're awesome! :) Thank you
ReplyDeleteWhat about I want to change the proportion of Norman?
ReplyDeleteShould I do it before follow this tutorial?
Thanks ! But one question, is it possible to make a kid from this rig ? smaller legs, hands without brake a rig.
ReplyDeleteThanks guys :)
ReplyDelete