Just notes on a few things we touched upon last week that I neglected to mention in my previous post.
During our usual critique, some useful, yet under-exposed, Maya tools were brought to light by one of our lovely patrons Brandon Nason.
First things first: Motion Trails!
Motion trails will create visible paths for your selected attributes complete with frame numbers, so becomes really easy to detect problems with the flow or kinks within your animation. It looks something like this:
(The path could also look bright red with white dots showing the keys.)
But where are these Motion Trails?
Maya 2011:
Select the attribute you wish to trail.
>Make sure "Animation" is selected from the drop down menu at the top left-hand side.
>>Go to the "Animate" tab
>>>Select "Create Motion Trail", use the option box and make sure to click "Show frame Number"
Maya 2012:
Select the attribute you wish to trail.
>Make sure "Animation" is selected from the drop down menu at the top left-hand side.
>>Go to the "Animate" tab
>>>Select "Create Editable Motion Trail", use the option box and make sure to click "Show frame Number"
The Glory of Weighted Tangents:
For those of you who weren't in club last week, and who aren't already using weighted tangents, we're going to change your life...or at least change the method in which you interact with the graph editor.
While the standard (non-weighted) tangents in Maya can be rotated and moved around, the length of the tangent handles themselves are confined to a set length. Weighted tangents (once you've clicked the right buttons, of course) will give you the freedom to pull out the tanget handles, allowing you better control over your curves with fewer keys for cleaner, smoother animation!
How to:
(Click all images to enlarge)
In your graph editor, select the curves you wish to weight. You can select one key or the whole curve, it doesn't matter, either way it will weight the whole curve what ever key you've selected
belongs to:
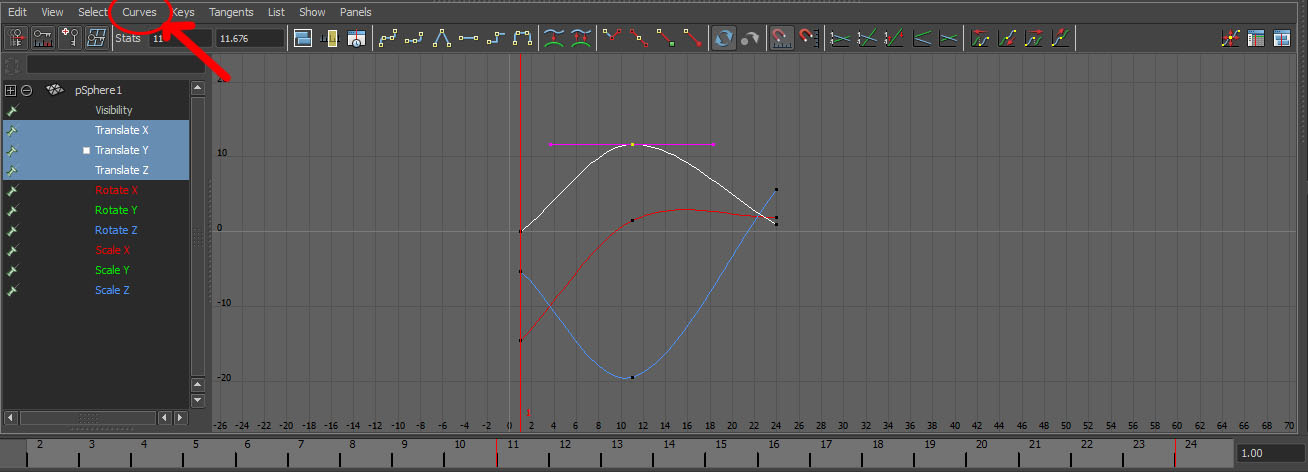
Then, still in the graph editor, select Curves>Weighted Tangents. Your tangents will then look something like this:
In this state, your curves will behave just like regular tangents, so you don't need to worry about the timing you've already nailed down (though if you begin to alter it, you'll see the tangent handles jump around a bit in length so keep an eye out). However, if you wish to have the ultimate freedom, simply select whatevert tangent you wish to manipulate (I'd do this in a case-by-case basis.) and click the "Free Tangent Weight" and "Break Tangents" buttons in your Graph editor window.
Now you will see that you have complete freedom over the length of your tangents.
If you wish for them to work together again, simply click the "Unify Tangents" button. If you wish for the tangent to not vary in length at your command, click the "Lock Tangent Weight" button